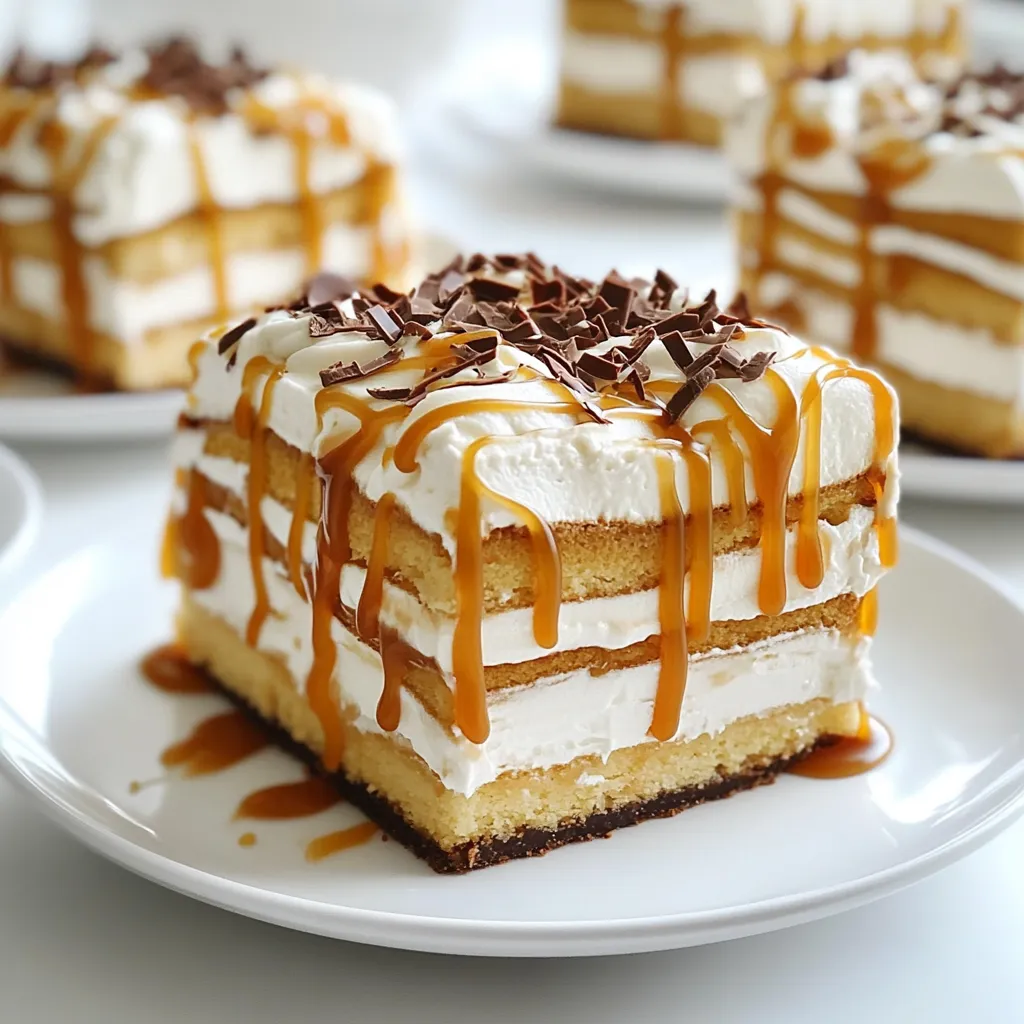
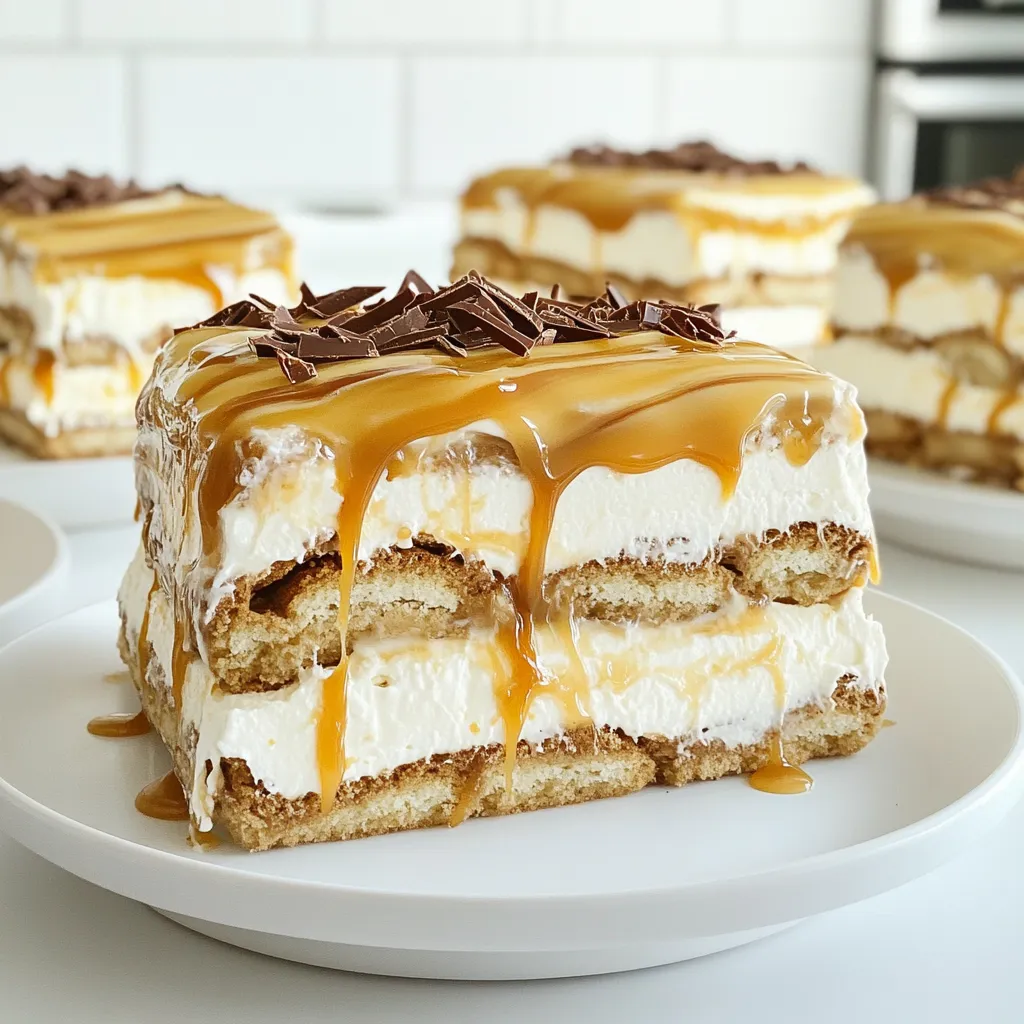
If you love coffee and dessert, you’ll adore this Caramel Macchiato Icebox Cake! This easy recipe combines rich caramel and smooth coffee flavors, making it a perfect treat for any occasion. Plus, you can customize it with different ingredients or even make it gluten-free. In this post, I’ll guide you step-by-step through making this delightful dessert, sharing tips, variations, and storage advice along the way. Let’s dive in!
Ingredients
Essential Ingredients for Caramel Macchiato Icebox Cake
To make a delicious Caramel Macchiato Icebox Cake, you need these key ingredients:
– 2 cups heavy cream
– 1 cup mascarpone cheese
– 1/2 cup powdered sugar
– 1 teaspoon vanilla extract
– 1 cup strong brewed coffee, cooled
– 1/2 cup caramel sauce
– 24 ladyfinger cookies
– 1 cup chocolate shavings for garnish
– Extra caramel sauce for drizzling (optional)
Each ingredient plays a big role in creating the rich flavor and creamy texture of this dessert. The heavy cream and mascarpone cheese give it a smooth and rich base. The coffee brings in that classic caramel macchiato taste. Lastly, the ladyfingers soak up the coffee and add a nice cake-like layer.
Optional Ingredients for Customization
You can personalize this dessert to fit your taste. Here are some optional ingredients you might consider:
– A sprinkle of sea salt for a salted caramel touch
– Espresso powder for a stronger coffee flavor
– Flavored liqueurs like coffee or hazelnut for added depth
– Fresh fruit, like sliced bananas or berries, to add freshness
These options can help you create a unique version of this cake. Feel free to mix and match based on what you love.
Ingredient Substitutions
If you can’t find something on the list, don’t worry. Here are some substitutes you can use:
– Swap heavy cream for whipped topping for a lighter option.
– Use cream cheese instead of mascarpone if you want a tangier flavor.
– Replace ladyfingers with sponge cake or graham crackers for a different texture.
– Use homemade caramel sauce if you want to control the sweetness.
These substitutions can make the recipe work for you, no matter the situation. Always feel free to experiment!
Step-by-Step Instructions
Preparation of Cream Mixture
Start by whipping 2 cups of heavy cream in a large bowl. Use an electric mixer on high speed. Whip until soft peaks form. In a separate bowl, mix 1 cup of mascarpone cheese, 1/2 cup of powdered sugar, and 1 teaspoon of vanilla extract. Blend these ingredients gently until smooth. Now, fold the whipped cream into the mascarpone mixture. Do this carefully to keep the fluffy texture.
Dipping and Layering Ladyfingers
Next, take 1 cup of strong brewed coffee that’s cooled. Pour it into a shallow dish. Dip each ladyfinger cookie in the coffee briefly. Make sure they soak just a little. You don’t want them too soggy. Once dipped, place the soaked ladyfingers at the bottom of a rectangular or square baking dish. This will form your first layer.
Assembling the Cake
Now it’s time to build your cake. Spread a layer of the mascarpone mixture over the ladyfingers. Drizzle 1/4 cup of caramel sauce on top. Repeat the process. Add another layer of dipped ladyfingers, followed by more mascarpone, and another drizzle of caramel. Keep layering until you finish all the ladyfingers and mascarpone. End with a layer of mascarpone on top. Cover the dish with plastic wrap and refrigerate. Chill for at least 4 hours, but overnight is best. This helps the flavors mix. Before serving, garnish with chocolate shavings and extra caramel sauce if you like.
Tips & Tricks
Whipping Cream Perfectly
To whip cream well, start with cold heavy cream. Use a clean bowl. An electric mixer on high speed works best. Whip until soft peaks form. This means the cream should hold its shape but still be smooth. Watch closely to avoid over-whipping. If you go too far, the cream can turn to butter.
Preventing Ladyfingers from Sogginess
Dipping ladyfingers is key. Quickly soak each cookie in cooled coffee. Don’t let them sit too long. A quick dip will keep them firm. If they soak too long, they become mushy. You want them soft but not falling apart. This gives the cake a nice texture.
Ideal Chilling Time for Best Results
Chill the assembled cake for at least four hours. Overnight is even better. This time helps the flavors mix well. It also allows the ladyfingers to soften just right. If you rush this step, the cake may not set properly. Patience pays off, leading to a delicious dessert!
Variations
Adding Flavor with Different Liqueurs
You can make this cake even more special by adding liqueurs. Try using coffee liqueur for a deeper flavor. You can also use hazelnut liqueur for a nutty twist. Just mix a little liqueur into your coffee before dipping the ladyfingers. This small change adds a new layer of taste.
Gluten-Free Option with Alternative Cookies
If you need a gluten-free option, use gluten-free ladyfingers. Many brands offer these cookies, and they taste great. You can also try gluten-free graham crackers. Just make sure they are firm enough to hold the layers. Soak them briefly in coffee to keep them from getting too soft.
Seasonal Twists: Pumpkin or Peppermint Versions
Change up the flavors to match the seasons. For fall, add pumpkin puree and spices like cinnamon and nutmeg to the mascarpone. This gives a warm, cozy feel. In winter, try peppermint extract mixed into the cream. Top with crushed candy canes for a festive crunch. Both variations keep the spirit of this cake while adding new flavors.
Storage Info
Best Practices for Storing Leftovers
To keep your Caramel Macchiato Icebox Cake fresh, store it in the fridge. Use an airtight container or cover it tightly with plastic wrap. This keeps the cake moist and tasty for up to three days. If you have more than you can eat, you can freeze it. Just remember, the cream layers may change a bit in texture.
Freezing Instructions for Long-Term Storage
To freeze your icebox cake, first slice it into squares. This makes it easier to grab a piece later. Wrap each slice in plastic wrap, then place them in a freezer-safe bag. Make sure to remove as much air as possible. You can freeze the cake for up to three months.
How to Revive the Cake After Freezing
When you’re ready to enjoy your frozen cake, take it out of the freezer. Let it sit in the fridge overnight to thaw slowly. If you’re short on time, you can leave it at room temperature for about an hour. Once thawed, you might want to add a drizzle of fresh caramel sauce. This gives it a nice touch and makes it taste fresh again.
FAQs
Can I make this dessert a day in advance?
Yes, you can make this dessert a day in advance. In fact, it tastes even better after sitting overnight. The flavors blend nicely when the cake chills for a longer time. Just cover it well with plastic wrap to keep it fresh.
How long can the Caramel Macchiato Icebox Cake be stored?
You can store the Caramel Macchiato Icebox Cake in the fridge for about three days. Make sure to keep it covered. After three days, it may lose its texture and taste. For best results, enjoy it within those days.
Can I use a different type of cookie instead of ladyfingers?
Yes, you can use other cookies. If you want a gluten-free option, try almond cookies or gluten-free wafers. Just ensure they can soak up coffee without falling apart. Experimenting with different cookies can give the cake a new twist!
This blog post covered how to make a Caramel Macchiato Icebox Cake. We explored essential and optional ingredients that you can use. The step-by-step guide helps you prepare, layer, and assemble the cake easily. I shared tips to whip cream well and keep ladyfingers from getting soggy. You can even try fun variations and learn the best ways to store leftovers. Enjoy this treat for any occasion, and feel free to experiment. Your cake will impress everyone with its taste and presentation!