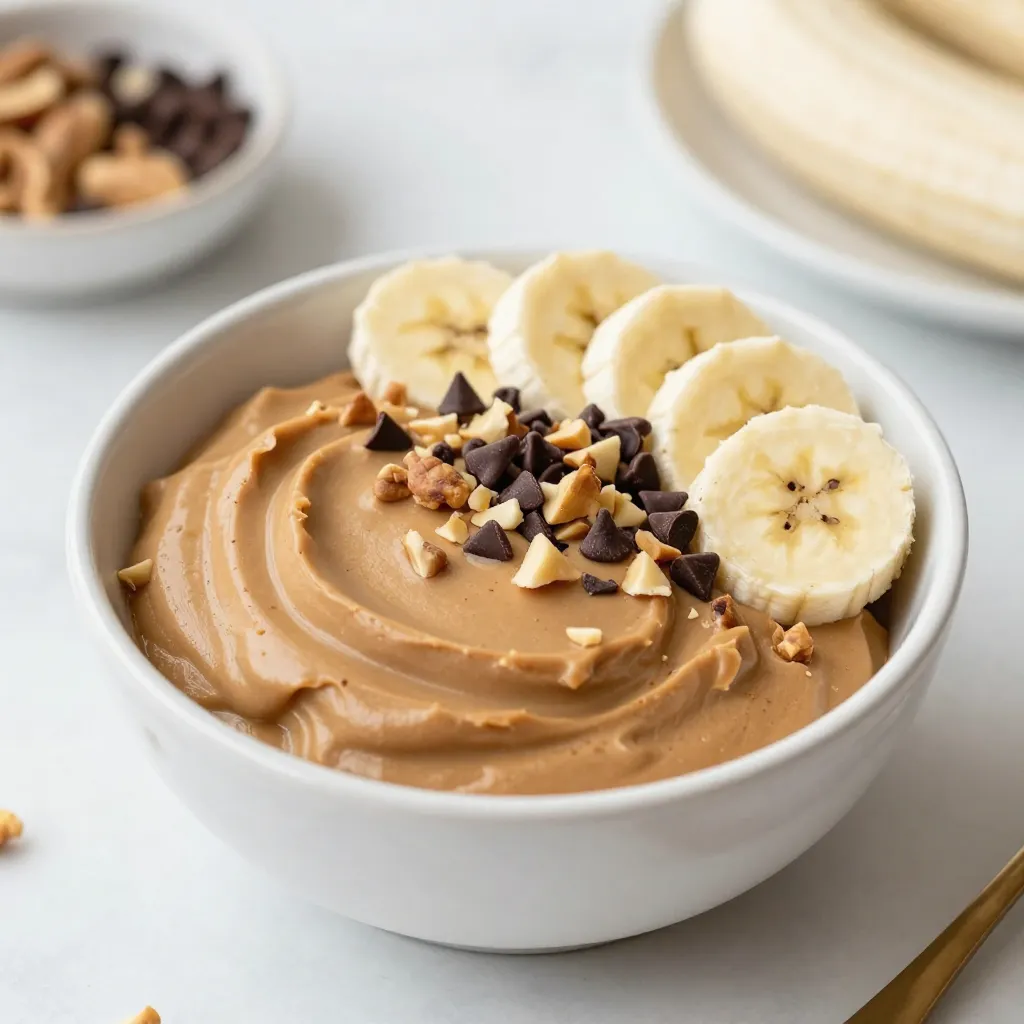
Looking for a tasty way to enjoy a cool treat? You’ll love this Peanut Butter Banana Nice Cream! It’s creamy, simple, and perfect for hot days. Made with ripe bananas and creamy peanut butter, it’s a healthy twist on ice cream. I’ll guide you through each step and share some fun tips to customize your nice cream. Let’s dive into this delicious dessert and make your taste buds sing!
Why I Love This Recipe
- Simple Ingredients: This recipe uses only a handful of wholesome ingredients that are easy to find and combine.
- Healthy Treat: It’s a guilt-free dessert that satisfies sweet cravings while providing nutrients from bananas and peanut butter.
- Customizable: You can easily adjust the sweetness and add your favorite toppings to make it your own.
- Quick to Make: With minimal prep time, you can enjoy this delicious nice cream in no time!
Ingredients
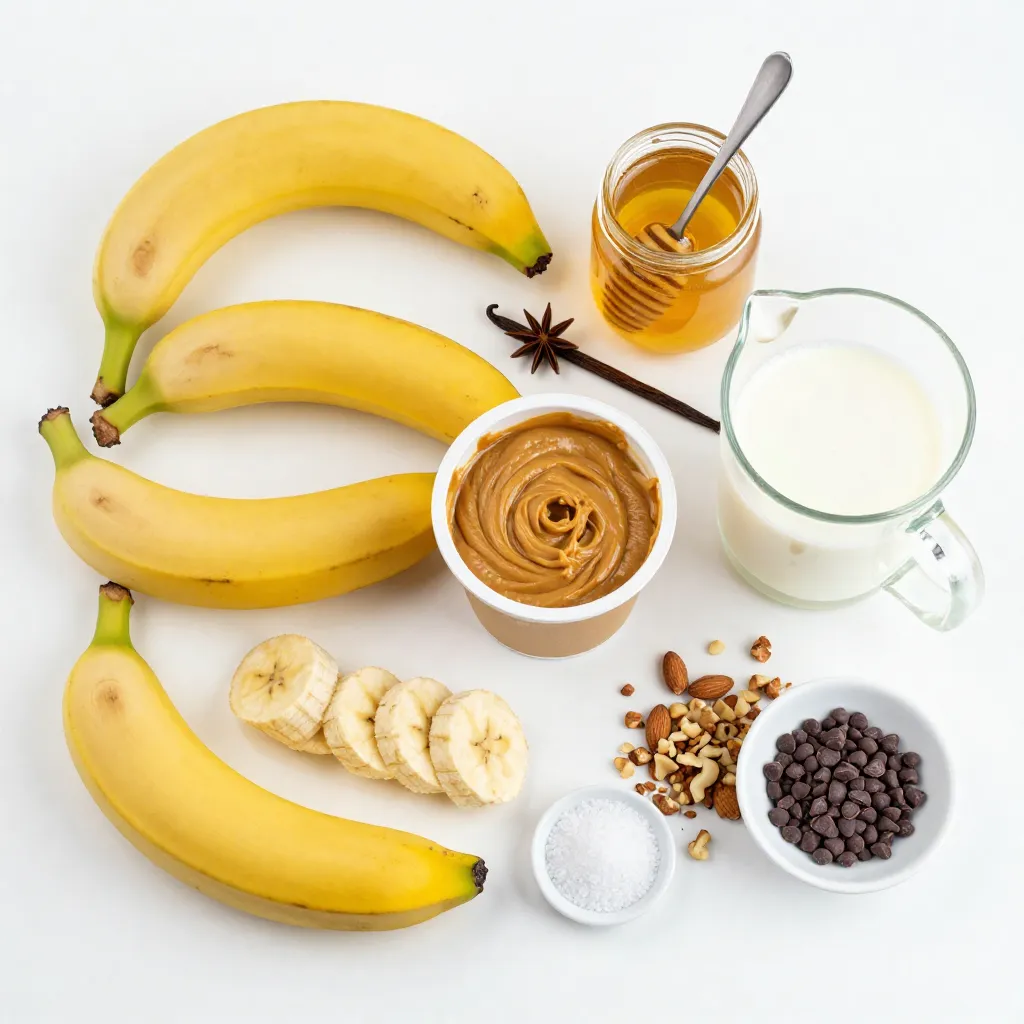
Main Ingredients
– Ripe bananas
– Creamy peanut butter
– Sweetener options (honey or agave syrup)
– Vanilla extract
– Milk options (almond milk or alternatives)
– Sea salt
When I make Peanut Butter Banana Nice Cream, I start with ripe bananas. They should be sweet and soft. I slice them and freeze the pieces. This gives the nice cream a cold, creamy base. Next, I add creamy peanut butter. It brings a rich, nutty flavor that pairs well with bananas.
For sweetness, I use honey or agave syrup. Both options work great, and you can choose what fits your diet. A splash of vanilla extract adds depth to the flavor. For the base, I like unsweetened almond milk, but any milk works. Finally, I sprinkle in a pinch of sea salt. This tiny touch enhances all the flavors.
Optional Toppings
– Chopped nuts
– Chocolate chips
– Sliced bananas
Toppings take nice cream to the next level. I love adding chopped nuts for crunch. They add a nice texture contrast. Chocolate chips give a sweet burst with every bite. Sliced bananas also work well as a fresh addition. You can mix and match toppings to make it your own.
Step-by-Step Instructions
Preparing the Bananas
Start by slicing the ripe bananas. Spread the slices on a baking sheet lined with parchment paper. This helps prevent sticking. Freeze the banana slices for about 2-3 hours until they are completely solid. This step is key to getting the right texture in your nice cream.
Blending Ingredients
After the bananas are frozen, take them out and let them sit for 5 minutes. This softens them just enough for blending. In a food processor, combine the frozen banana slices with peanut butter, honey, vanilla extract, almond milk, and a pinch of sea salt.
Achieving Desired Texture
Pulse the mixture until it becomes smooth and creamy. If it’s too thick, add a splash of almond milk to help it blend better. Taste your nice cream and adjust the sweetness if needed. You can serve it right away for a soft-serve treat. If you want it firmer, transfer it to an airtight container and freeze for another 30 minutes. Enjoy your creamy creation!
Tips & Tricks
Ensuring Creamy Texture
To make your nice cream smooth and creamy, use a food processor. Start with frozen banana slices. The colder they are, the better they blend. If your mix is too thick, add a bit of almond milk. This helps it blend well. Remember to scrape down the sides to mix everything evenly. Gradual liquid addition is key. It prevents the mixture from becoming too watery.
Sweetness Adjustments
Taste your nice cream after blending. You might want it sweeter. You can add honey or agave syrup. Each sweetener gives a different flavor. You can also try maple syrup for a unique twist. Adjust the sweetness to fit your taste. This way, your nice cream is just how you like it.
Presentation Ideas
Serving nice cream can be fun! Use bowls or cones to scoop it in. Top with your favorite extras. Chopped nuts add crunch, while chocolate chips bring sweetness. Extra banana slices look nice too. Make it colorful and appealing. The more creative, the better it looks! Enjoy the process of making it a treat for the eyes as well as the taste buds.
Pro Tips
- Choose Ripe Bananas: The riper the bananas, the sweeter and creamier your nice cream will be. Look for bananas with brown spots for optimal flavor.
- Freeze Bananas Properly: Make sure to freeze the banana slices in a single layer on a parchment-lined baking sheet. This prevents them from sticking together.
- Blend Smoothly: If your mixture is too thick, add small amounts of almond milk gradually until you reach your desired consistency.
- Experiment with Flavors: Try adding other ingredients such as cocoa powder, cinnamon, or even a scoop of protein powder to customize your nice cream.
Variations
Flavor Variations
You can change the flavor of your nice cream easily. One fun way is by adding cocoa powder or chocolate. Just mix in 2 tablespoons of cocoa powder when you blend the bananas. This gives you a rich, chocolatey treat that pairs well with peanut butter.
You can also try different nut butters. Almond butter or cashew butter works great too. Each nut butter adds its own unique taste. Just swap the peanut butter with your favorite nut butter in the recipe.
Dietary Adjustments
If you want to make this nice cream vegan, use agave syrup instead of honey. You can also skip the sweetener if your bananas are very ripe. For low-calorie options, consider using less peanut butter. You can also add more banana slices to keep the creaminess while lowering calories.
Seasonal Variations
Seasonal fruits can bring a fresh twist to your nice cream. In summer, add fresh strawberries or blueberries for a fruity surprise. In fall, consider mixing in pumpkin puree and spices. This creates a cozy fall flavor that is fun to enjoy.
You can also change the toppings based on the season. In winter, sprinkle some cinnamon or nutmeg on top. In spring, use fresh mint leaves or edible flowers for a colorful touch. These small changes can make your nice cream feel festive and fun!
Storage Info
Storing Leftover Nice Cream
To keep your nice cream fresh, use airtight containers. Glass jars or plastic tubs work well. Make sure they seal tightly to prevent ice crystals. This keeps the nice cream creamy and tasty.
To maintain texture, allow the nice cream to cool before sealing. If you freeze it right after making, it may become hard. To avoid this, let it sit out for a few minutes before putting it away.
Freezing Tips
If you want to freeze nice cream for later, scoop it into containers. Use smaller containers for easy serving. This way, you won’t have to thaw the whole batch.
When you’re ready to enjoy it, take it out of the freezer. Let it thaw for about 10-15 minutes. This helps it soften. It will be easier to scoop and taste great!
FAQs
What is nice cream?
Nice cream is a simple, healthy dessert made from frozen fruit. Unlike traditional ice cream, it has no dairy or added sugar. Nice cream is creamy and easy to make. You blend frozen fruit with a liquid like milk or nut butter. This gives it a smooth texture. You can enjoy nice cream without the guilt of regular ice cream.
Can I use frozen bananas?
Yes, using frozen bananas is great! Frozen bananas make the nice cream smooth and creamy. They add a natural sweetness too. Fresh bananas can work, but they won’t give the same texture. When you freeze ripe bananas, they become soft and easy to blend. This is why I always recommend freezing them first.
How long will nice cream last in the freezer?
Nice cream can last about one to two weeks in the freezer. To keep it fresh, store it in an airtight container. Over time, it may get icy or lose its creamy texture. So, it’s best to eat it within a week for the best taste. If it gets too hard, let it sit out for a few minutes before serving.
You can easily make delicious nice cream at home with just a few ingredients. This blog post covered the best ingredients, step-by-step instructions, and tips for a creamy treat.
Feel free to experiment with flavors and toppings to suit your taste. Always store any leftovers properly to keep them fresh and tasty. Enjoy a healthy dessert that feels indulgent but is good for yo