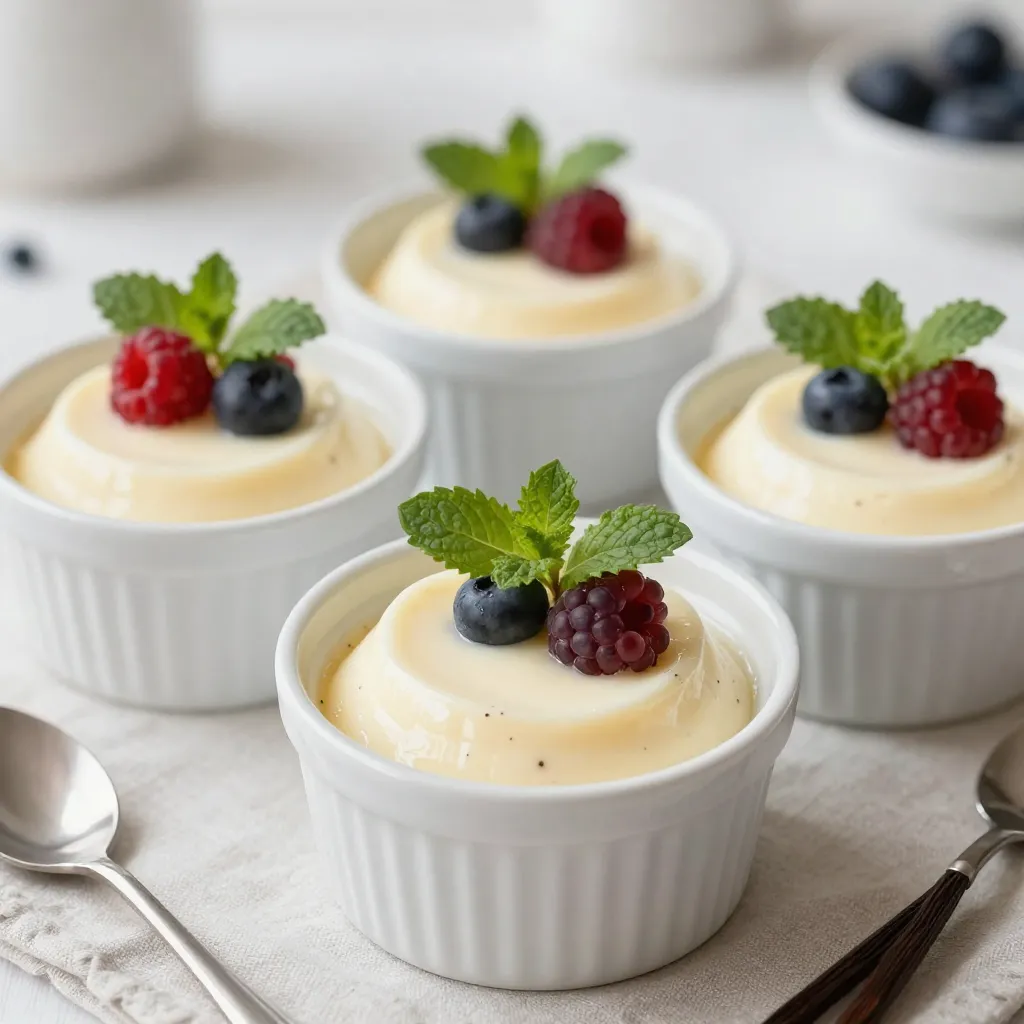
If you’re craving a sweet treat that’s both easy and elegant, look no further! This Vanilla Bean Panna Cotta is a creamy delight that will impress your guests and satisfy your taste buds. With just a few simple ingredients, you can create a dessert that feels luxurious without any fuss. Join me as I guide you through the steps to make this classic Italian dessert, complete with tips, variations, and storage info!
Why I Love This Recipe
- Indulgent Creaminess: The combination of heavy cream and whole milk creates a luxuriously smooth and creamy texture that melts in your mouth.
- Elegant Presentation: Panna cotta looks stunning when served in individual ramekins or glasses, making it perfect for dinner parties or special occasions.
- Customizable Flavors: This basic vanilla recipe can easily be adapted with different flavorings like chocolate, coffee, or fruit purees for variety.
- Effortless Preparation: With just a few simple steps, this dessert can be prepared ahead of time, allowing you to enjoy the celebration without stress.
Ingredients
List of Ingredients
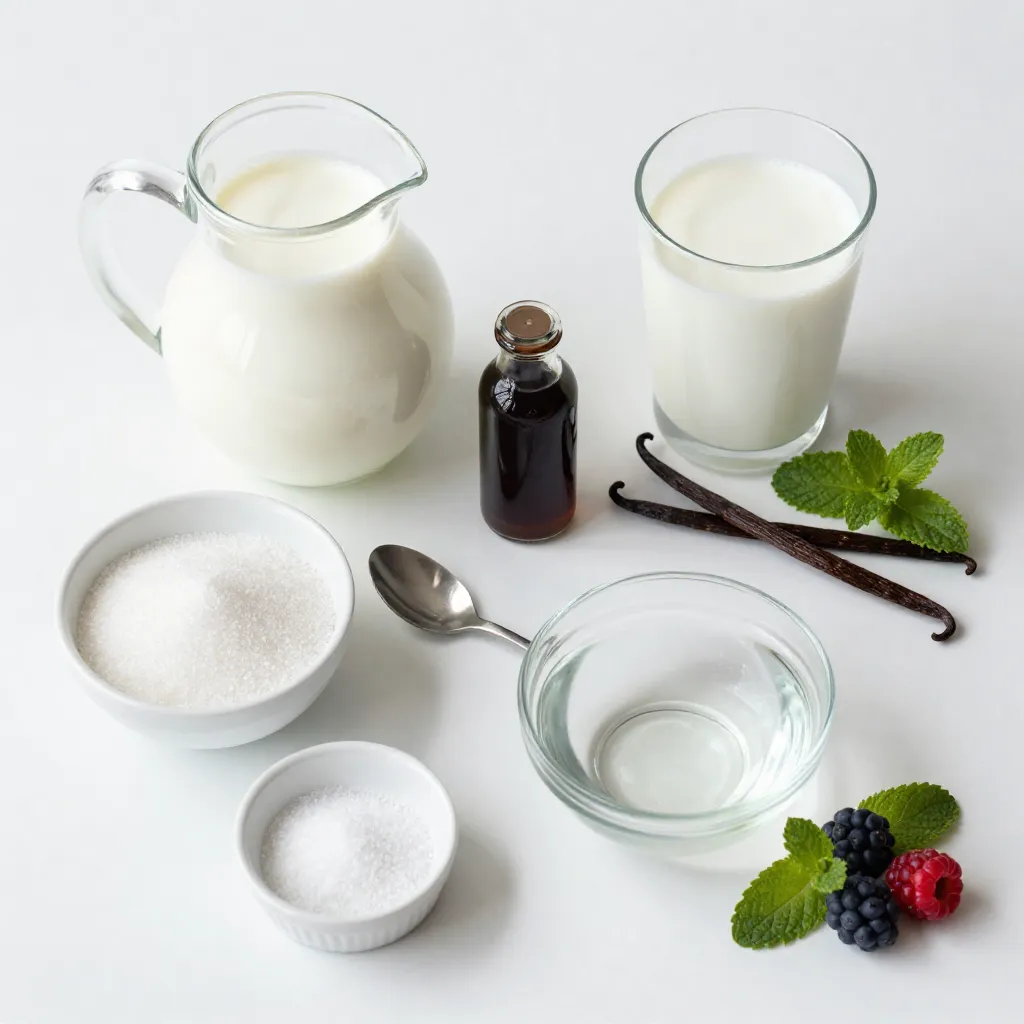
To make Vanilla Bean Panna Cotta, you will need:
– 2 cups heavy cream
– 1 cup whole milk
– 1/2 cup granulated sugar
– 2 teaspoons pure vanilla extract
– 1 vanilla bean, split with seeds scraped
– 2 1/2 teaspoons powdered gelatin
– 3 tablespoons cold water
– Pinch of salt
These ingredients create a creamy, smooth dessert that melts in your mouth.
Optional Garnishes
You can make your panna cotta even better with some garnishes. Here are a few ideas:
– Fresh berries, like strawberries or raspberries
– Mint leaves for a pop of green
– A drizzle of fruit coulis for added flavor
These garnishes add color and taste, making your dessert look stunning.
Dietary Substitutions
If you need to change any ingredients, here are some options:
– For dairy-free panna cotta, use coconut milk or almond milk instead of cream and whole milk.
– If you’re looking to cut sugar, use a sugar substitute like stevia or monk fruit.
– For a vegan version, swap gelatin with agar-agar.
These substitutions help you enjoy this treat while meeting your dietary needs.
Step-by-Step Instructions
Initial Preparation (Blooming Gelatin)
First, we need to bloom the gelatin. In a small bowl, sprinkle the powdered gelatin over three tablespoons of cold water. Let it sit for about five minutes. This step is very important. It helps the gelatin dissolve well later.
Cooking the Cream Mixture
Next, grab a medium saucepan. Combine the heavy cream, whole milk, granulated sugar, pure vanilla extract, and the seeds from the split vanilla bean. Don’t forget to add the vanilla pod too. Heat this mixture over medium heat. Stir gently until the sugar fully dissolves. You want it to come to a gentle simmer, but do not let it boil. Once it simmers, remove the saucepan from the heat. Now, add the bloomed gelatin. Stir until it fully dissolves in the warm cream.
Setting the Panna Cotta
Now, it’s time to strain the mixture. Pour it through a fine mesh sieve into a large bowl. This step removes the vanilla pod and any undissolved gelatin. After straining, pour the mixture evenly into ramekins or serving glasses. Let it cool to room temperature. Cover each ramekin with plastic wrap and refrigerate for at least four hours. This allows the panna cotta to set completely. When ready to serve, run a knife around the edges. Invert it onto a plate, or leave it in the glass for a nice look. Garnish with fresh berries and mint leaves if you like. Enjoy your creamy treat!
Tips & Tricks
Achieving the Perfect Texture
To make panna cotta smooth and creamy, start with fresh ingredients. Use heavy cream and whole milk for the best result. When you heat the cream mixture, stir gently. Avoid boiling it, as this can change the texture. Blooming the gelatin is key; let it sit in cold water until it swells. This step ensures it dissolves well when mixed in. Straining the mixture helps remove any lumps and bits of the vanilla bean.
Common Mistakes to Avoid
One common mistake is not letting the gelatin bloom long enough. If you skip this, your panna cotta may not set. Another mistake is overheating the cream mixture. Always remove it from the heat as soon as it simmers. If you rush the cooling process, it may not set properly. Lastly, avoid skipping the refrigeration time. Allow at least four hours for the panna cotta to firm up.
Serving Suggestions
For a lovely presentation, consider garnishing with fresh berries. Strawberries, blueberries, or raspberries work well. Mint leaves can add a fresh touch, too. You can also serve panna cotta in clear glasses for a beautiful view of the layers. If you want extra flavor, drizzle a berry coulis over the top. This not only adds color but also enhances the taste. Enjoy your panna cotta chilled for the best experience!
Pro Tips
- Blooming Gelatin: Ensure that the gelatin is fully bloomed in cold water before adding it to the warm mixture for the best texture.
- Temperature Control: Always heat the cream mixture gently and avoid boiling to prevent curdling and maintain a smooth consistency.
- Straining for Smoothness: Straining the mixture helps eliminate any lumps and ensures a silky panna cotta, so don’t skip this step!
- Serving Suggestions: For an elegant touch, serve with a homemade berry coulis or layer fresh fruits on top for added flavor and color.
Variations
Flavor Additions (e.g., Chocolate, Coffee)
You can change the flavor of your panna cotta to keep things exciting. Try adding chocolate for a rich twist. Melt some dark chocolate and stir it into the cream mixture before you cool it. You can also use coffee to add depth. Brew a strong coffee and mix it into the cream. Both options make a delicious dessert that will impress your friends.
Dairy-Free Alternatives
If you want a dairy-free panna cotta, swap out the heavy cream and milk. Use coconut milk for a creamy texture and a hint of coconut flavor. Almond milk works too, but it may not be as rich. Remember to check for unsweetened options to control the sugar level. You can use the same steps in the recipe to make a tasty dairy-free treat.
Seasonal Fruit Combinations
Using fresh fruit can elevate your panna cotta. In summer, top it with ripe berries or peaches for a refreshing taste. In fall, try caramelized apples or spiced pears. You can also blend fruits like strawberries or raspberries to make a sauce. Just pour it over the panna cotta before serving for a fruity burst. Each season brings new flavors, so mix and match to find your favorite!
Storage Info
Proper Refrigeration Techniques
To keep your vanilla bean panna cotta fresh, store it in the fridge. Cover each ramekin with plastic wrap. This method helps prevent the panna cotta from absorbing any smells. You can also use a sealed container if you prefer. Always place the panna cotta in the coldest part of the fridge. This keeps it at a safe temperature and helps it set well.
Freezing Panna Cotta
You can freeze panna cotta, but be careful. Freezing may change its texture. To freeze, first let it set in the fridge. Then, wrap each ramekin tightly with plastic wrap. After that, place them in an airtight container. When ready to serve, thaw it in the fridge overnight. Avoid microwaving it to defrost as this can ruin the creaminess.
Shelf Life Tips
Vanilla bean panna cotta lasts about 4-5 days in the fridge. Keep an eye on it and check for any signs of spoilage. If you see any off smells or changes in texture, it’s best to discard it. If you freeze it, it can last up to 2 months. Remember to label your containers with the date for easy tracking. This way, you can enjoy your delightful treat at its best!
FAQs
What is the origin of Panna Cotta?
Panna Cotta is an Italian dessert. The name means “cooked cream” in Italian. It comes from the northern region of Piedmont. This dessert has roots in a time when cooks used simple ingredients. They combined cream, sugar, and gelatin to create this smooth treat. People enjoyed it for its light texture and sweet flavor. Now, Panna Cotta is popular around the world. Chefs often add flavors like vanilla or fruit to make it unique.
Can I make Panna Cotta in advance?
Yes, you can make Panna Cotta ahead of time. I often prepare it a day before serving. This gives it plenty of time to set. After making it, cover the ramekins with plastic wrap. Place them in the fridge for at least four hours. If you want, you can store it for up to three days. Just keep it covered to maintain freshness. This makes it a great option for parties or special meals.
Why isn’t my Panna Cotta setting?
If your Panna Cotta isn’t setting, check a few things. First, make sure you used enough gelatin. The recipe calls for 2 1/2 teaspoons. If you use less, it may not firm up. Also, ensure the gelatin bloomed well in cold water. This process helps it dissolve properly. If you didn’t heat the cream mixture enough, the gelatin might not activate. Lastly, allow enough time in the fridge. It needs at least four hours to set fully. If you follow these tips, your Panna Cotta should be smooth and creamy.
This blog post covered how to make panna cotta, from ingredients to storage. You learned what ingredients to use and how to choose garnishes. I shared tips for perfect texture and common mistakes to avoid. You can explore variations for flavors and dietary swaps. Proper storage ensures your panna cotta lasts and stays fresh. Panna cotta is simple yet very rewarding. Experimenting with flavors and textures makes it fun. Enjoy making this delightful trea